



Planting and Growing Norfolk Island pine

| Care difficulty | 3 / 5 |
|---|---|
| Watering schedule | Moderate regular watering, allowing brief slight drying between soakings |
| Sunlight requirements | Full sun · Partial shade |
| Ideal temperature | 15 – 25 °C |
| Soil type | Chalk · Loam · Sand |
| Soil pH | Acid · Alkaline · Neutral |
| Soil moisture | Moist but well drained |
| Fertilizing | Balanced perennial feed every four weeks from spring through summer |
| Toxicity | Information to be completed |
How to Water Norfolk Island pine?
Originating from the humid subtropical climate of Norfolk Island, norfolk island pine is accustomed to consistent moisture and does not tolerate drought well. It thrives in environments that mimic its native habitat's humidity levels. For optimal health, norfolk island pine should be watered once every 1-2 weeks, allowing the soil to dry slightly between waterings. As an evergreen plant, norfolk island pine benefits from regular misting to maintain the ambient humidity it loves, especially when grown indoors where air can be drier.
Learn more →What Are the Sunlight Requirements for Norfolk Island pine?
Norfolk island pine flourishes under partial sun conditions, which balances exposure to gentle sunlight with periods of shade. Although norfolk island pine can adapt to both full sun and full shade, these extremes may impact its vigor. In full sun, norfolk island pine may experience stress, potentially leading to leaf burn, while full shade can lead to sparse growth. The plant's leaves can adjust to varying light by altering angle and position for optimal absorption. Ideally placed outdoors, norfolk island pine should be situated where it's shielded from harsh midday sun, yet can bask in the softer morning or late afternoon light.
Learn more →What Is the Ideal Temperature Range for Norfolk Island pine?

Norfolk island pine exhibits moderate resilience to temperature variations but has defined limits. It tolerates temperatures down to 0℃ (32℉) and up to 43℃ (109℉). This range suggests a need for protective measures in environments with extreme cold or heat. Symptoms of overcooling include browning or drooping leaves, while overheating can cause wilting and sunburn. To counteract these conditions, use frost cloths or mulching in cold, and shading and increased watering in heat. Its care requirements reflect its sensitivity, necessitating mindful placement to avoid temperature stress.
Learn more →What Soil Is Best for Norfolk Island pine?
Norfolk island pine prefers deep, loose, fertile, well-drained soil. It grows on slightly acidic to neutral soil, with a suitable pH of 4.5-5.5 or light saline soil. When transplanting seedlings, add organic fertilizer to the tree pits to ensure healthy plant growth.
- Soil type
- Chalk · Loam · Sand
- Soil pH
- Acid · Alkaline · Neutral
What Are the Moisture Requirements for Norfolk Island pine?
Moist but well drained
Learn more →How to Fertilize Norfolk Island pine?

To maintain robust growth, fertilize norfolk island pine with a balanced, slow-release fertilizer every three months during active growth in spring and summer. Monthly liquid feedings can also supplement nutritional needs. This encourages dense, healthy foliage and root development. Less is more; avoid overfertilization which can damage delicate roots. Adjust application in fall and winter, reducing it as growth slows. Always water norfolk island pine before fertilizing to protect roots. Measure fertilizer precisely, adhering to product guidelines, ensuring a healthier norfolk island pine.
Learn more →How to Prune Norfolk Island pine?

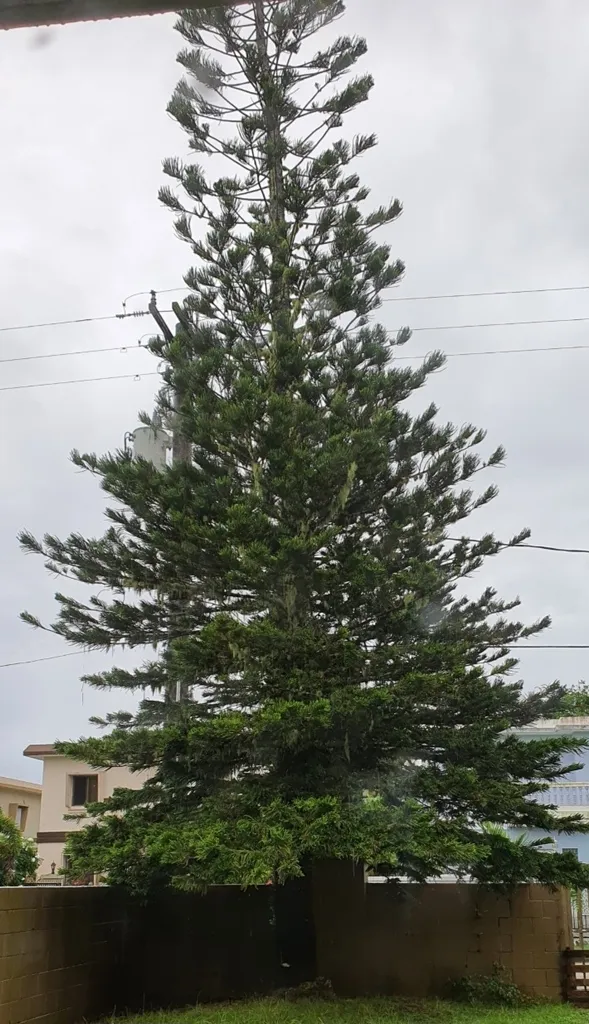
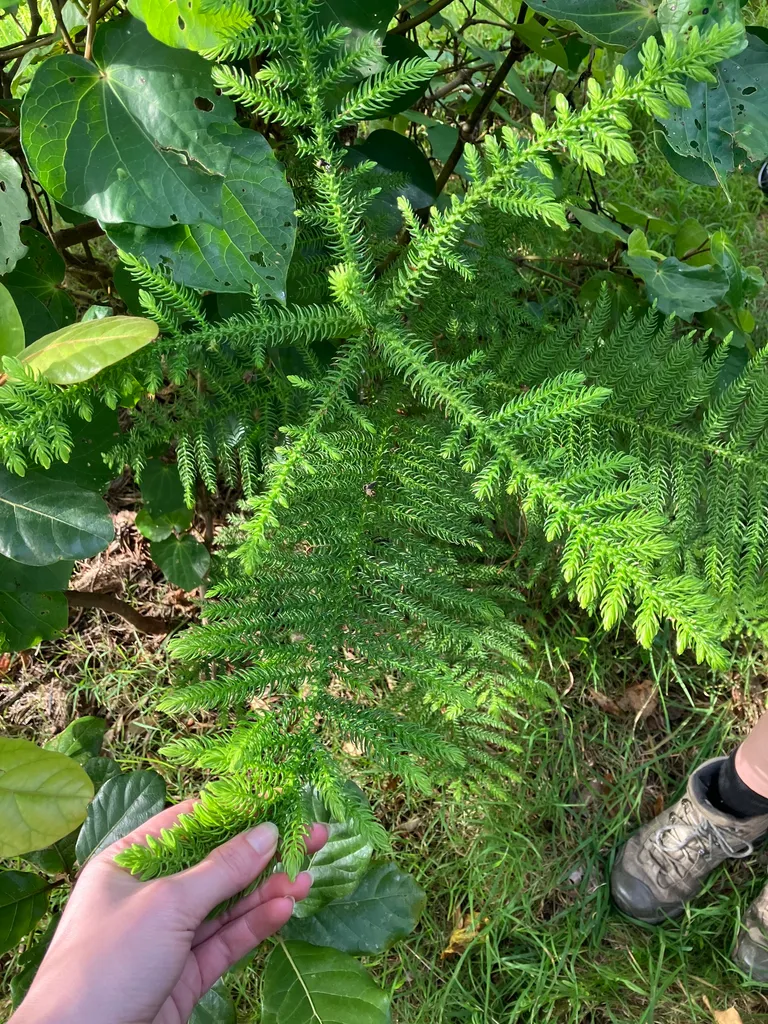
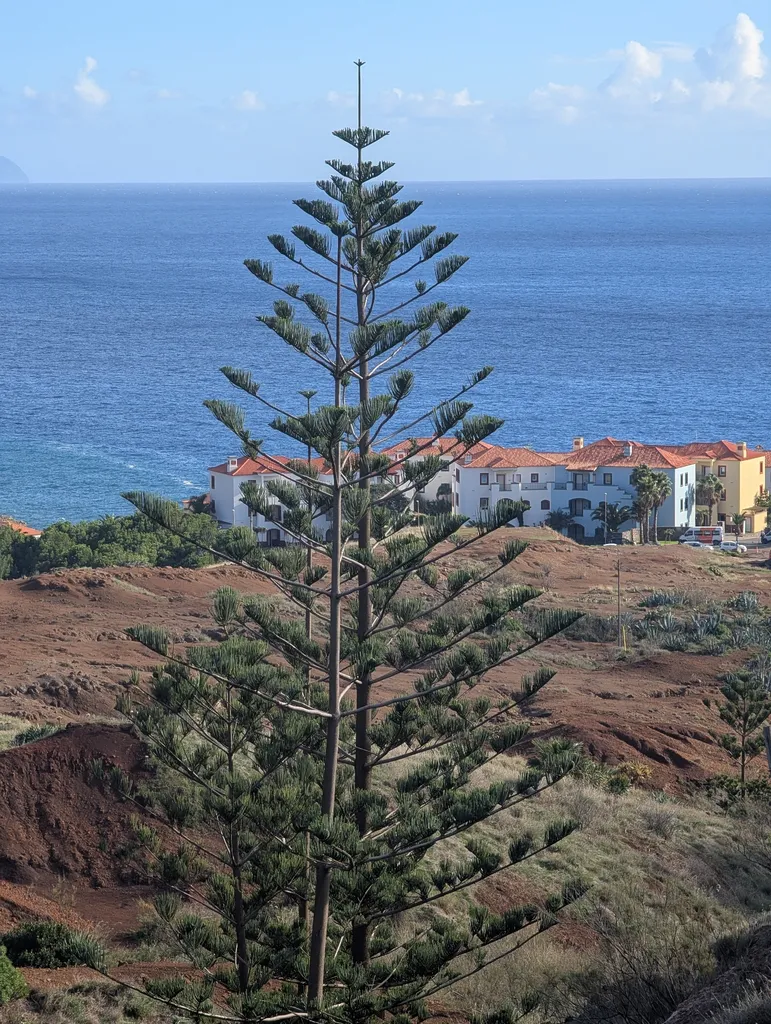
Norfolk island pine is a distinctive, evergreen conifer known for its symmetrical shape and soft, needle-like leaves. Pruning should be done in early to late winter, targeting dead or damaged branches to maintain health and shape. Avoid heavy pruning as norfolk island pine has a slow growth rate, which might stress the plant. Light trimming encourages a dense canopy and prevents legginess. Pruning also enhances air circulation, minimizing pest issues. Consult trusted horticultural guides for specific techniques.
Learn more →How to Propagate Norfolk Island pine?
Norfolk island pine is frequently cultivated for its lush, symmetrical foliage and ease of care. For successful propagation, semi-hardwood cuttings are recommended. These should be taken from healthy parent plants, preferably using the apical stem tips, to ensure vigorous growth. Cuttings must be treated with rooting hormone and placed in well-draining soil, under high humidity, and with adequate indirect light. Consistent moisture is imperative, but overwatering should be avoided to prevent rot. Root development typically occurs within several weeks, after which gradual acclimatization is necessary before transplanting to a permanent location.
Learn more →How to Transplant Norfolk Island pine?
The ideal season for transplanting norfolk island pine is from mid-autumn to late winter, as the cooler temperatures encourage root development. Choose a sunny location and avoid waterlogged soil. Remember to handle this delicate plant with care during the transplant process!
Learn more →How to Care for Norfolk Island pine in Winter?

Native to a subtropical climate, norfolk island pine has no inherent winter hardiness, and prolonged exposure to temperatures below 50°F (10°C) can cause it harm. Over winter, norfolk island pine requires a cool, bright indoor setting, preferably with high humidity. It's vital to avoid over-watering - wait until the soil's top inch feels dry. Remember, warmer homes will require more frequent watering!
Learn more →How to Plant Norfolk Island pine?
Indoors-potted: In an indoor setting, norfolk island pine thrives with ample space to accommodate its grand stature, adding a touch of nature's majesty to your home decor. Outdoors-potted: When potted outdoors, norfolk island pine requires strategic placement to prevent wind damage while showcasing its symmetrical conical form. Outdoors-in the ground: Norfolk island pine planted in the ground outdoors becomes a majestic landscape feature, but be cautious of space as it can reach towering heights.
Learn more →How to Repot Norfolk Island pine?
Repot norfolk island pine every 2-3 years to accommodate its growth, typically gaining height rather than spreading wide. Spring, before a growth spurt, is ideal. Choose a pot 2-3 inches larger in diameter, ensuring ample room for the root system. Post-repotting, maintain moist soil and avoid direct sunlight to help norfolk island pine recover and thrive. This attentive care encourages its majestic, symmetrical growth.
Learn more →Common Pests & Diseases
Diseases
May be susceptible to honey fungus
Pests
Generally pest-free
Explore the plant health library →Troubleshooting
Leaf Scorch, Yellowing Chlorosis, or Root/Crown Decline
Norfolk Island pine (Araucaria heterophylla) depends on deep, well-drained soil and appropriate sun/moisture balance; waterlogged roots, drought stress, or unsuitable soil pH quickly show in foliage color.
| What you notice | Possible explanation | What to check next |
|---|---|---|
| Leaf margins turn brown and crispy in summer heat, or young foliage wilts despite adequate sunlight | Drought stress, drying winds, or afternoon sun scorch (especially on thin-leaved trees like Acer palmatum or newly planted specimens) | Check soil moisture 10–15 cm (4–6 inches) deep and assess afternoon sun and wind exposure |
| Leaves turn pale yellow between dark green veins (interveinal chlorosis) or whole canopy yellows and thins | Alkaline soil pH locking up iron/manganese (critical for ericaceous Vaccinium corymbosum and lime-hating oaks/maples) or poor drainage causing root rot | Test soil pH and inspect root-zone drainage after heavy rain or irrigation |
- Plant in well-drained soil suited to its pH needs (Acid, Alkaline, Neutral pH) in full sun or partial shade, mulching the root zone with organic bark or leaf mold kept clear of the trunk.
- Water deeply during dry spells, especially in the first two years after planting: Moderate regular watering, allowing brief slight drying between soakings.
- Protect frost-tender or container-grown woody species before winter freezes.
If sudden branch dieback with dark vascular streaking or mushroom growth at the base occurs (suspected Verticillium wilt or honey fungus), prune out dead wood cleanly and consult local extension diagnostics.
Poor Flowering/Fruiting or Sap-Sucking Pests and Mildew
Insufficient sunlight, improper pruning timing, or dense unpruned canopies can reduce blooms and fruit while encouraging aphids, scale, caterpillars, or powdery mildew.
| What you notice | Possible explanation | What to check next |
|---|---|---|
| Vigorous leafy shoots with few flowers or poor fruit set | Excessive shade, high-nitrogen fertilizer, pruning off old-wood flower buds at the wrong season, or lack of cross-pollination (for fruit crops like blueberries/cherries) | Review daily sun hours, fertilizer ratio, and pruning timing |
| Curled sticky new shoots, white powdery leaf coating, or chewed foliage | Common pests (Generally pest-free) or fungal issues (May be susceptible to honey fungus) | Inspect shoot tips, leaf undersides, and inner canopy airflow |
- Prune at the appropriate seasonal window: Little pruning is needed. Remove diseased, damaged, crowded or crossing shoots and unwanted growth. Timing depends on the plant: generally late winter or early spring; plants prone to bleeding and deciduous magnolias need different timing, and deciduous azaleas and lilacs are pruned after flowering..
- Thin crowded interior shoots to improve sunlight penetration and air circulation, and clean up fallen leaves in autumn.
- Blast aphids off sturdy shoots with a firm water spray or use insecticidal soap per label instructions.
Avoid late-summer nitrogen feeding, which forces soft late growth vulnerable to early autumn frost.