



Planting and Growing chives

| Care difficulty | 1 / 5 |
|---|---|
| Watering schedule | Moist soil during active growth, then reduce watering after foliage yellows |
| Sunlight requirements | Full sun · Partial shade |
| Ideal temperature | 10 – 20 °C |
| Soil type | Chalk · Clay · Loam · Sand |
| Soil pH | Acid · Alkaline · Neutral |
| Soil moisture | Moist but well drained · Well drained |
| Fertilizing | Light bulb fertilizer at emergence and again after flowering |
| Toxicity | Information to be completed |
How to Water chives?
Thriving in its native, moisture-rich environments, chives has adapted to require consistent hydration. This species exhibits a preference for evenly moist soil conditions, reflecting its origins from damp meadows. Watering every week is optimal to maintain its lushness and support growth. In domestic settings, chives favors outdoor cultivation where it can benefit from natural rainfall patterns. As an herb that flourishes with regular watering, chives's vitality is most pronounced during the growing season when water availability aligns with its active development phase.
Learn more →What Are the Sunlight Requirements for chives?
Chives flourishes best in conditions offering full sun; such exposure ensures robust growth, optimal health, and abundant flowering. Should full sun not be viable, chives can tolerate partial sun, though this may result in reduced vigor and fewer blooms. With an adaptive resilience to light variations, chives can adjust to less than ideal lighting situations without significant harm. For outdoor planting, choose a site with ample sunlight throughout the day. When grown indoors, a south-facing window would provide the light intensity chives needs to thrive.
Learn more →What Is the Ideal Temperature Range for chives?

Chives demonstrates notable resilience to temperature variations, tolerating cold down to -20℃ (-4℉) and heat up to 38℃ (100℉). This adaptability makes it a viable option for diverse climates. Despite its hardiness, exposure to extreme cold may cause leaf tip burn or stunted growth, while excessive heat can lead to wilting or browning. For optimal care, protective measures such as mulching during cold spells and shading or adequate watering during heat waves are recommended. Chives's wide temperature tolerance thus allows it to thrive in various environments, making it a versatile addition to any garden.
Learn more →What Soil Is Best for chives?
For chives, ensure well-drained soil with good aeration. Use a soil mix of garden soil, compost, and sand or perlite in equal parts to prevent water-logging. Enhance growth by adding a balanced, slow-release fertilizer at planting and mid-season. Regular organic matter additions, like compost, can further support healthy growth.
- Soil type
- Chalk · Clay · Loam · Sand
- Soil pH
- Acid · Alkaline · Neutral
What Are the Moisture Requirements for chives?
Moist but well drained · Well drained
Learn more →How to Fertilize chives?

Fertilize chives with high nitrogen fertilizer to bolster leaf growth. Apply a balanced liquid feed every 4-6 weeks during the growing season; reduce in winter. A light dose, as per product guidelines, sustains health and vigor. For blooming, phosphorus can support but focus remains on nitrogen. Use diluted solutions to prevent root burn and incorporate into watering routine for consistency. Seasonal adjustments enhance chives's growth and development stages, aiding in a more prolific harvest.
Learn more →How to Prune chives?

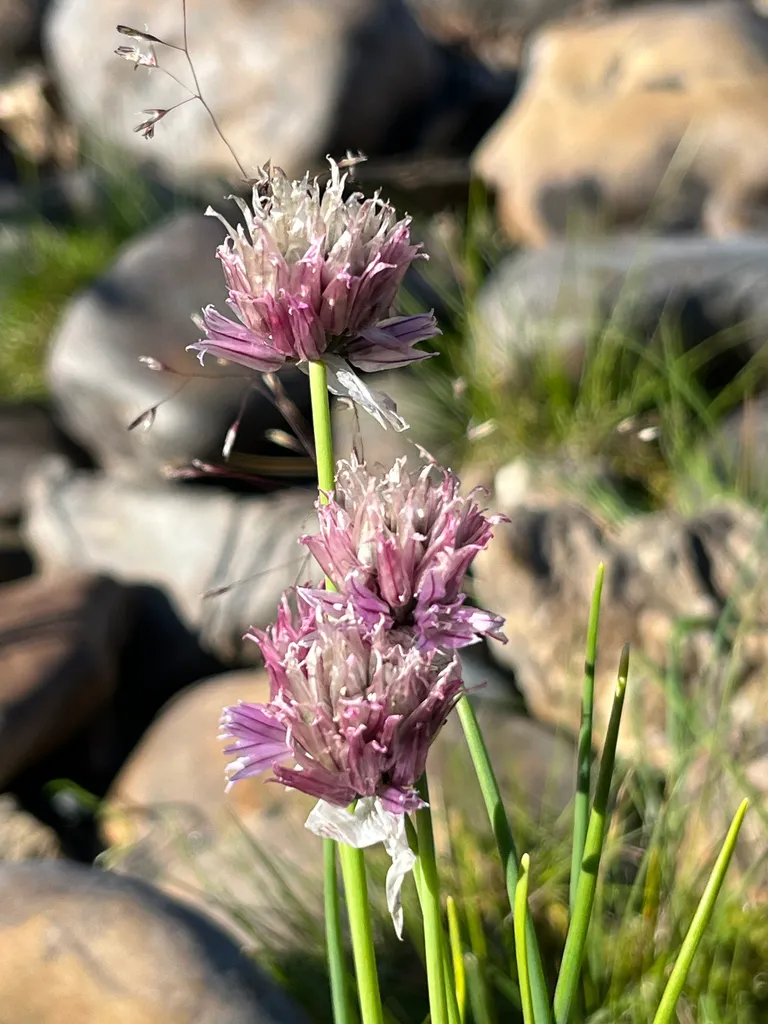
Chives is a flavorful herb featuring slender, tubular leaves and delicate purple flowers. Prune chives in early to later spring to encourage a continuous, healthy growth cycle. Snip leaves evenly from the base, using sharp scissors, to ensure a uniform regrowth. Remove any dead or yellowing foliage regularly. Regular pruning prevents flowering, prolongs the harvesting period, and supports robust, bushy growth. Keep the plant hydrated post-pruning to facilitate recovery and maintain vibrancy.
Learn more →How to Propagate chives?

Chives is typically propagated in the Spring using the tubers. This method is relatively easy and the successful signs include new shoots and root growth. Ensure proper planting depth to promote healthy propagation.
Learn more →How to Transplant chives?
For chives, the ideal transplanting time is during mid to late spring, as it allows ample time for a robust root system to develop. Choose a sunny location with well-draining soil, and consider enriching the soil with compost before transplanting. Happy growing!
Learn more →How to Plant chives?
Indoors-potted: Cultivate your chives indoors with ample space to thrive; they enjoy spreading their roots in a deep pot for lush, flavorful growth. Outdoors-potted: Chives, when potted outdoors, require diligent spacing management to prevent overcrowding and ensure each sprout gets its share of resources. Outdoors-in the ground: Planted directly in the garden, chives becomes a hardy companion that can tolerate cold snaps, returning yearly if allowed to reseed naturally.
Learn more →How to Repot chives?
Needs excellent drainage in pots.
Learn more →Common Pests & Diseases

Diseases
Generally disease-free. Onion white rot and onion downy mildew may occur
Pests
Generally pest-free
Explore the plant health library →Troubleshooting
Yellowing Leaf Tips, Rust Pustules, or Overcrowded Clumps
chives (Allium schoenoprasum) depends on full sun, well-drained fertile soil, and steady moisture during active growth and harvest development.
| What you notice | Possible explanation | What to check next |
|---|---|---|
| Orange powdery pustules on tubular leaves, or yellowing leaves in waterlogged soil | Allium rust or root/white rot in poorly drained soil | Check soil drainage and inspect leaves for orange rust pustules |
| Clump center becomes congested with thin, woody flower stalks and sparse tender leaves | Overcrowded bulbs needing division and post-bloom cutback | Inspect clump density and flower stalk age |
- Harvest tubular leaves regularly about 5 cm (2 inches) above the soil, cut back the entire clump after flowering to stimulate fresh regrowth, and divide congested clumps every 3 to 4 years in spring.
- Water at the base of plants early in the day rather than wetting foliage overhead to reduce fungal diseases.
- Remove and destroy any rust-infected leaves promptly and thin congested clumps to improve airflow.
Keep Allium schoenoprasum away from cats and dogs, as ingestion causes oxidative red blood cell damage (hemolytic anemia).
Sap-Sucking Pests, Beetles, or Slugs
Edible crops and fruiting plants attract aphids, spider mites, scale, beetles, or slugs during warm growth.
| What you notice | Possible explanation | What to check next |
|---|---|---|
| Curled new shoots, sticky honeydew, or fine webbing on leaf undersides | Aphids, spider mites, whiteflies, or scale insects | Inspect growing tips and leaf undersides closely |
| Chewed leaves or young shoots near soil level | Slugs, snails, leaf beetles, or caterpillars | Inspect foliage and soil surface early in the morning |
- Rinse aphids and spider mites off sturdy foliage with a firm spray of water, and hand-pick beetles or slugs.
- Encourage beneficial predators and keep garden beds free of decaying plant debris.
- If needed, apply food-crop-approved insecticidal soap or horticultural oil strictly according to label directions and pre-harvest intervals.
Always wash harvested fruits, herbs, and vegetables thoroughly before eating, and avoid spraying open blossoms.